This guide is designed to provide step-by-step instructions to ensure a seamless Meshmerize activation and setup process for your ACKSYS device.
Please refer to the list of devices to ensure that this guide applies to your device.
The Secure Shell Protocol (SSH) is not activated on WaveOS devices. Hence, you need to access your device via its graphical user interface (GUI). To activate Meshmerize, you will need to configure the Wi-Fi interface to deploy the Meshmerize role. After that, you'll need to license the device. Once that's done, you can proceed to configure the Meshmerize service and optionally activate the Hive-Worker service.
¶ Overview
- Access the GUI
- Set up a Meshmerize Wi-Fi interface
- Get a Meshmerize license
- Configure Meshmerize
- Enable Hive-Worker
All configuration steps require that you have access to your device via its graphical user interface (GUI).
¶ 1. Access the WaveOS Graphical Interface
To begin, connect your ACKSYS device to your computer via an Ethernet cable, and connect to the graphical user interface (GUI) inside your browser. The secure shell protocol (SSH) is not activated on WaveOS devices. Hence, the device can only be accessed via its GUI using the WaveOS default IP 192.168.1.253.
The GUI will ask for a password. If you have not set a password yet, click on “Login” and you will be prompted to set a password. After a successful login, you are directed to the GUI's STATUS page as shown in the image below.

From here, you can start with the activation steps for Meshmerize.
¶ 2. Setup Wi-Fi Interface for Meshmerize
WaveOS comes with Meshmerize already installed, but it is not activated by default. To use Meshmerize, you need to setup a Wi-Fi interface for Meshmerize.
You can do that by either creating a new interface or by editing an existing one.
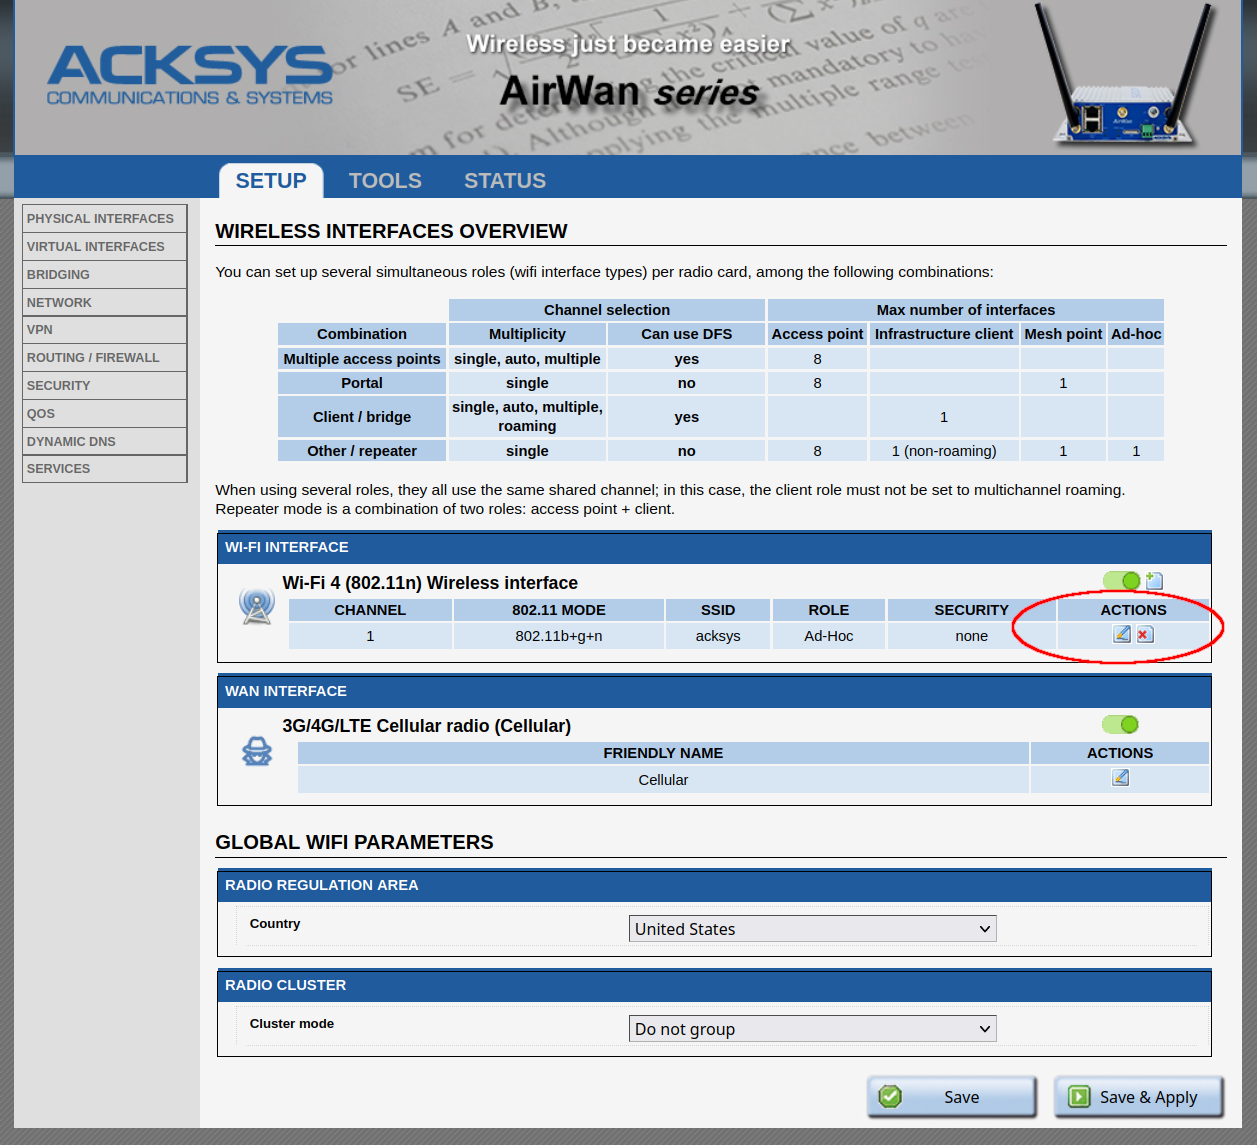
To get to the interfaces, navigate to "SETUP" → "PHYSICAL INTERFACES.".
You should see a similar page as the one displayed below. Depending on the number of radios your device has, one or more Wi-Fi interfaces will be listed. The device used for the example screenshot has only one radio.
If you want to edit the existing Wi-Fi interface, click on the circled edit icon under “ACTIONS''. If you want to create a new Wi-Fi interface, click on the plus-page symbol above ”ACTIONS".
Either way, this will lead you to the wireless settings page of that interface.
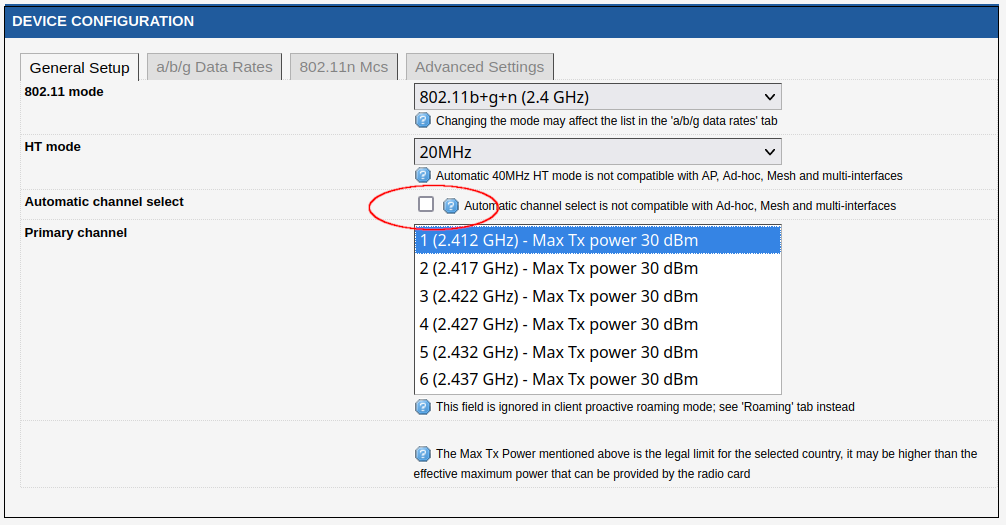
In “DEVICE CONFIGURATION”, please disable "Automatic channel select," and choose a "Primary channel", as shown on the image below.
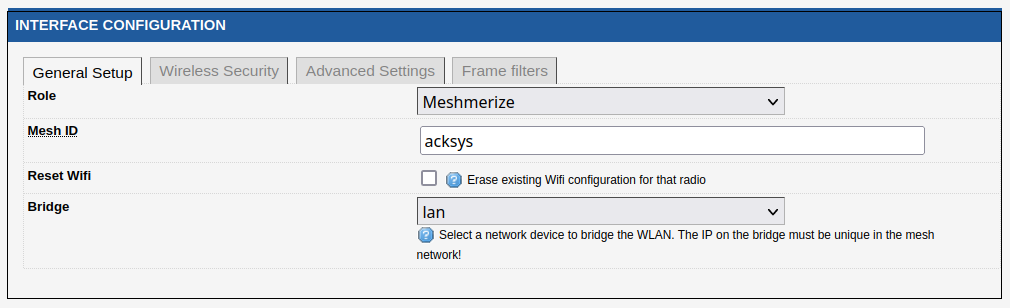
Then, select Meshmerize as Role inside "INTERFACE CONFIGURATION."
Please enter a Mesh ID, for example ‘acksys' as shown below. The Mesh ID same as a SSID needs to be the same for all devices inside one mesh network.
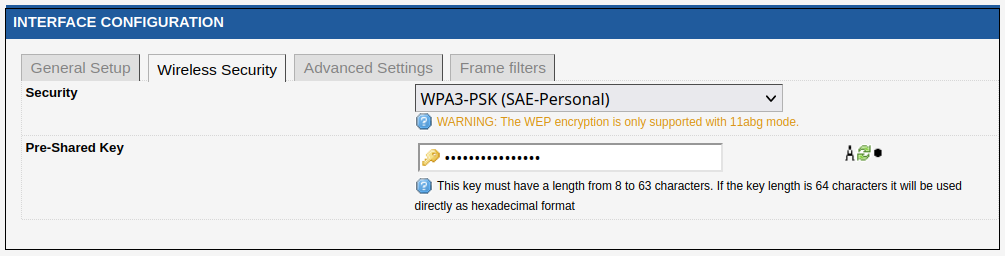
To enable encryption go to the ‘Wireless Security’ tab and select SAE-Personal and enter a passphrase as shown below. Same as the Mesh ID, the passphrase needs to be identical for all devices inside the mesh.
Now, Meshmerize is activated. You can check the status of Meshmerize in the STATUS tab under SERVICES -> MESHMERIZE.
To connect to the internet (or to be able to get an IP-address from a DHCP-server), your device must be configured as a DHCP-client. To set up the DHCP-client, click on ‘Advanced Settings’ and enable ‘Add Mesh DHCP Client,’ as shown in the example below.

Click on ‘Save & Apply’ and all remaining settings will be adjusted automatically.
¶ 3. Meshmerize License Registration
Every device requires to have a license file installed that allows the usage of Meshmerize beyond the trial period. Without a valid license file, Meshmerize will not operate after the trial expires.
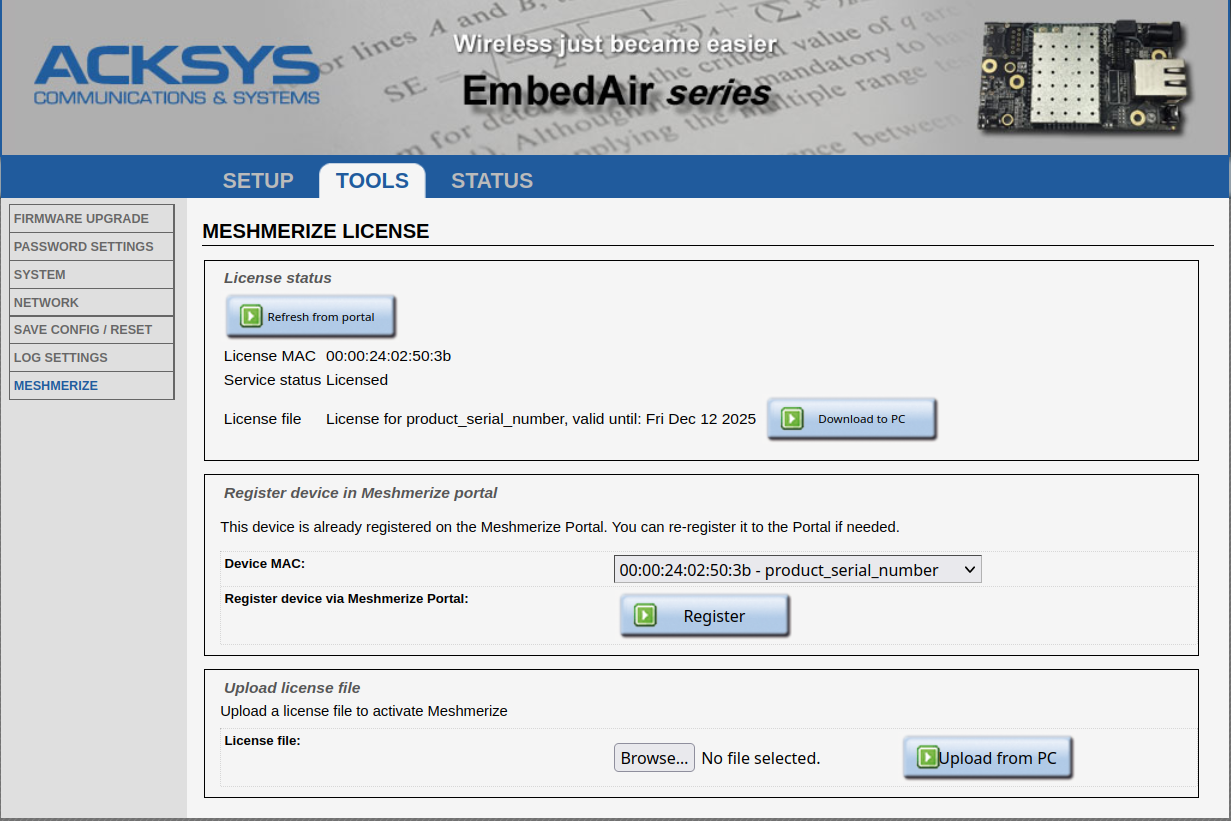
To view the current license status or install a Meshmerize license, navigate to TOOLS -> MESHMERIZE.
The Service status should indicate if your device is licensed or not. The image below illustrates what it looks like when your device has a valid Meshmerize license installed.
¶ How to activate a Meshmerize license?
- If you haven’t purchased a Meshmerize license yet, you can do it through the Meshmerize Portal.
- If you have already purchased a license, you can activate it here. If not already set, select the product serial number as Device MAC and click on Register Device. You will be redirected to the Meshmerize Portal device register page.
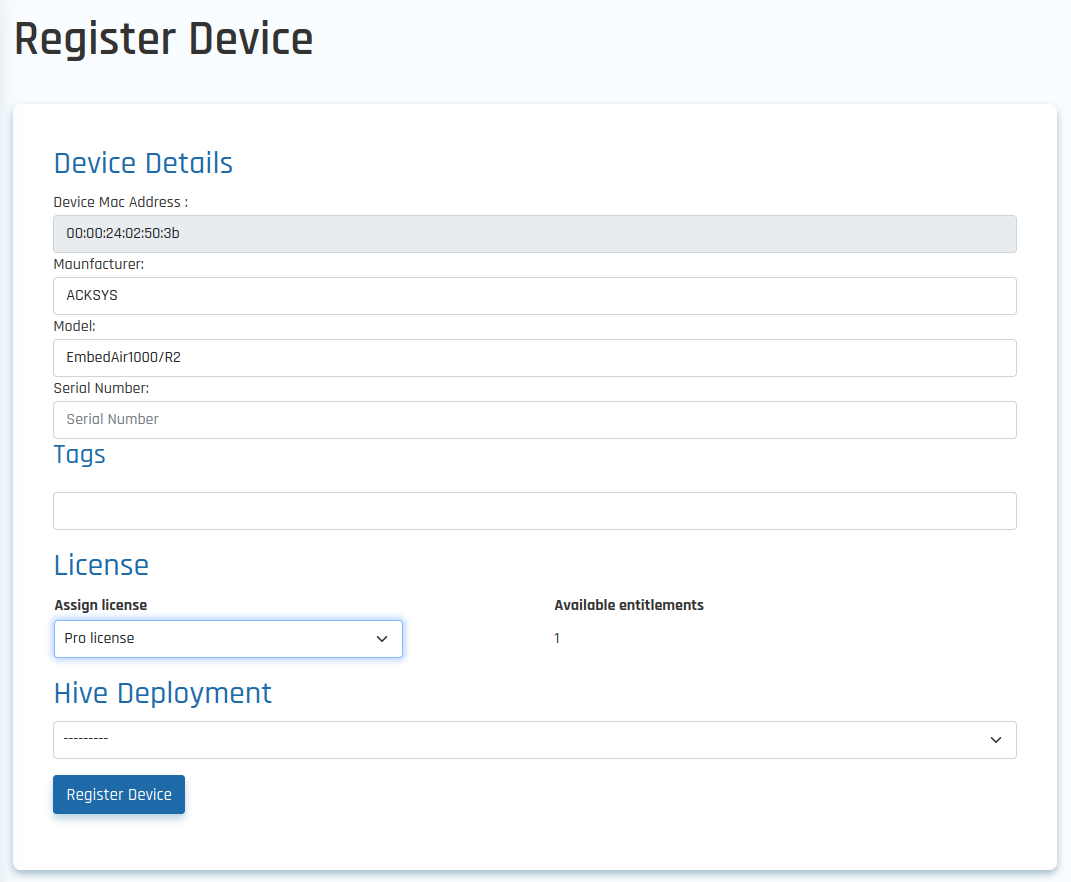
- Enter any tags to make identification of the device easier. Please note that only 16 characters can be used for one tag.
- Select the type of license you have purchased.
- (Optional) select the Hive deployment if you own Hive licenses.
- Click on Register Device to license the device. You will be redirected to the device's page. After some time the license status should be updated to Licensed, as shown in the image below.
- If you have a licensing file, you can also upload it directly to your device. To do so, click on Browse and choose a license file you want to upload from your files. Then click on Upload from PC.

Once you've registered your device, check the Service status. It should display Licensed to confirm that your device is now licensed.
If the status remains as “Trial mode” refer to the troubleshoot guide.
¶ 4. Meshmerize Configuration
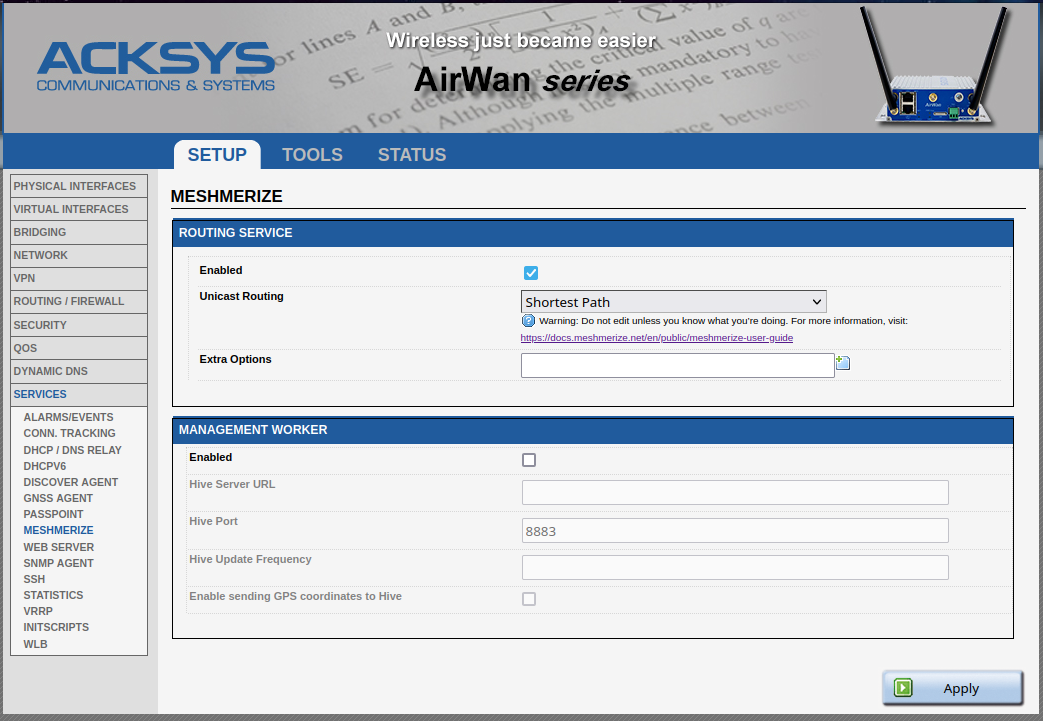
Meshmerize offers several settings to optimize your mesh network's performance. The best configuration may vary based on your specific network needs. To change the current configuration to better suit your network’s requirements navigate to SETUP> SERVICES> MESHMERIZE.
¶ Routing
Meshmerize offers two unicast routing algorithms: Multipath (Braided) and Shortest Path (DSDV). You can easily switch between them using the dropdown menu under Unicast Routing.
¶ Advanced Configuration
Further Meshmerize configurations can be done using the Extra Options field. The configuration options will be shared with you by the Meshmerize support.
¶ 5. Enable Hive-Worker
To enable Meshmerize to communicate with the Hive, you will need to use the Hive-worker service. Here’s how to set it up:
- Set Up a Hive instance
Ensure you have a running Hive instance. If you haven’t already, you can create a Hive deployment and obtain the Hive URL through the Meshmerize Portal.
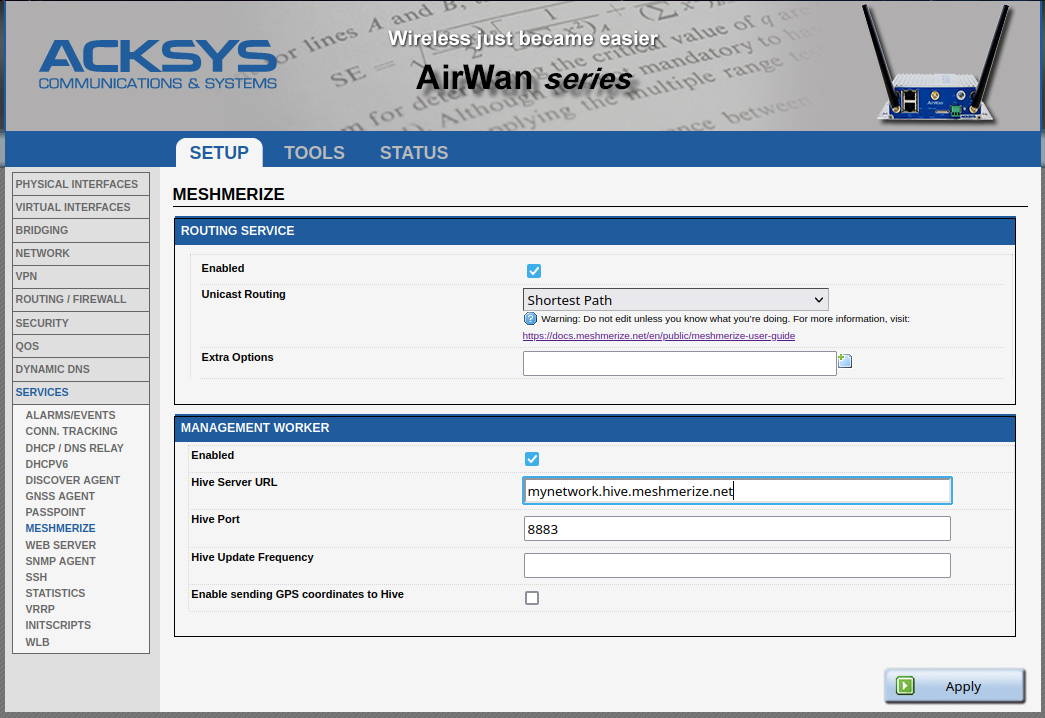
- Configure the MANAGEMENT WORKER
Enter the obtained Hive URL in the Hive Service URL field within the MANAGEMENT WORKER section. Make sure to check the Enabled box to activate communication. Please avoid altering the Hive port settings.
- Update Frequency settings
Adjust the Hive Update Frequency according to your requirements. The default setting is every 5 seconds, but you can change this to how often you want the Hive-Worker to send updates to Hive.
For any inquiries beyond the scope of this guide, please do not hesitate to reach out to us at support@meshmerize.net.
Should you require guidance on setting up WaveOS, we encourage referencing the Acksys User Guide for further instructions.