¶ RUTX Series
RUTX series devices are high-speed industrial Gigabit Ethernet routers powered by a Quad-core ARM Cortex A7 CPU. Built on RutOS, an OpenWrt-based Linux operating system, they are designed for demanding professional applications requiring robust security, extensive VPN support, and high-performance WiFi 5 connectivity. Their full aluminum housing and wide operating temperature range make them ideal for industrial deployments where reliability in extreme environments is essential.
¶ Specifications
| RUTX10 | RUTX11 | |
|---|---|---|
| Platform | Qualcomm Quad-core ARM Cortex A7, 717 MHz |
|
| Mobile | N/A | 4G LTE Cat 6 (up to 300 Mbps); Dual SIM |
| Memory / Storage | 256 MB DDR3 RAM 256 MB SPI Flash |
|
| Wireless | 802.11ac (WiFi 5) up to 867 Mbps Dual Band, MU-MIMO, 802.11r fast transition |
|
| GNSS / GPS | N/A | GPS, GLONASS, BeiDou, Galileo, QZSS |
| Frequency Bands | 2.4 GHz: 2400–2483.5 MHz 5 GHz: 5150–5905 MHz |
|
| Channel Widths | 20 / 40 / 80 MHz (Compliance with IEEE 802.11 b/g/n/ac standards) | |
| Wireless Data Rate | Up to 867 Mbps (5 GHz, WiFi 5) | |
| Bluetooth | Bluetooth 4.0 Low Energy (LE) for short-range communication | |
| Interfaces | 1 x WAN port (10/100/1000 Mbps) 3 x LAN ports (10/100/1000 Mbps) 1 x USB A 2.0 port 1 x Digital Input and 1 x Digital Output (on power connector) |
|
| Buttons / Switches | Factory reset button | |
| Power Input | 9 – 50 VDC (4-pin industrial DC socket) Passive PoE support through LAN port |
|
| Power Consumption | 9 W Max | 16 W Max |
| Operating Temperature | -40 °C to +75 °C | |
| Dimensions / Weight | 95 x 115 x 32 mm 355 g |
95 x 115 x 44 mm 456 g |
| Downloads | teltonika_rutx10-datasheet teltonika_rutx10-user-guide |
teltonika_rutx11-datasheet.pdf teltonika_rutx11-user-guide |
| MeshmerizeOS Upgrade Image | ||
¶ Installation
1. Download the MeshmerizeOS Image.
2. Follow the instructions in the Teltonika user guide for initially connecting to the device (go to the datasheet link).
3. In the web UI, go to System> Firmware> Update Firmware.
4. Then in the “Flash new firmware image” section, select “File” and click Browse to upload the downloaded MeshmerizeOS image. (Turn off the “keep settings” option for the first installation)
5. After the image file is successfully uploaded there will be a pop up page, confirm the firmware update with the button “Proceed”.
¶ Getting Started
With the Meshmerize image installed you will find a dedicated Meshmerize page in the Network section of the WebUI. This page contains the license management as well as basic configuration for Meshmerize and Hive.
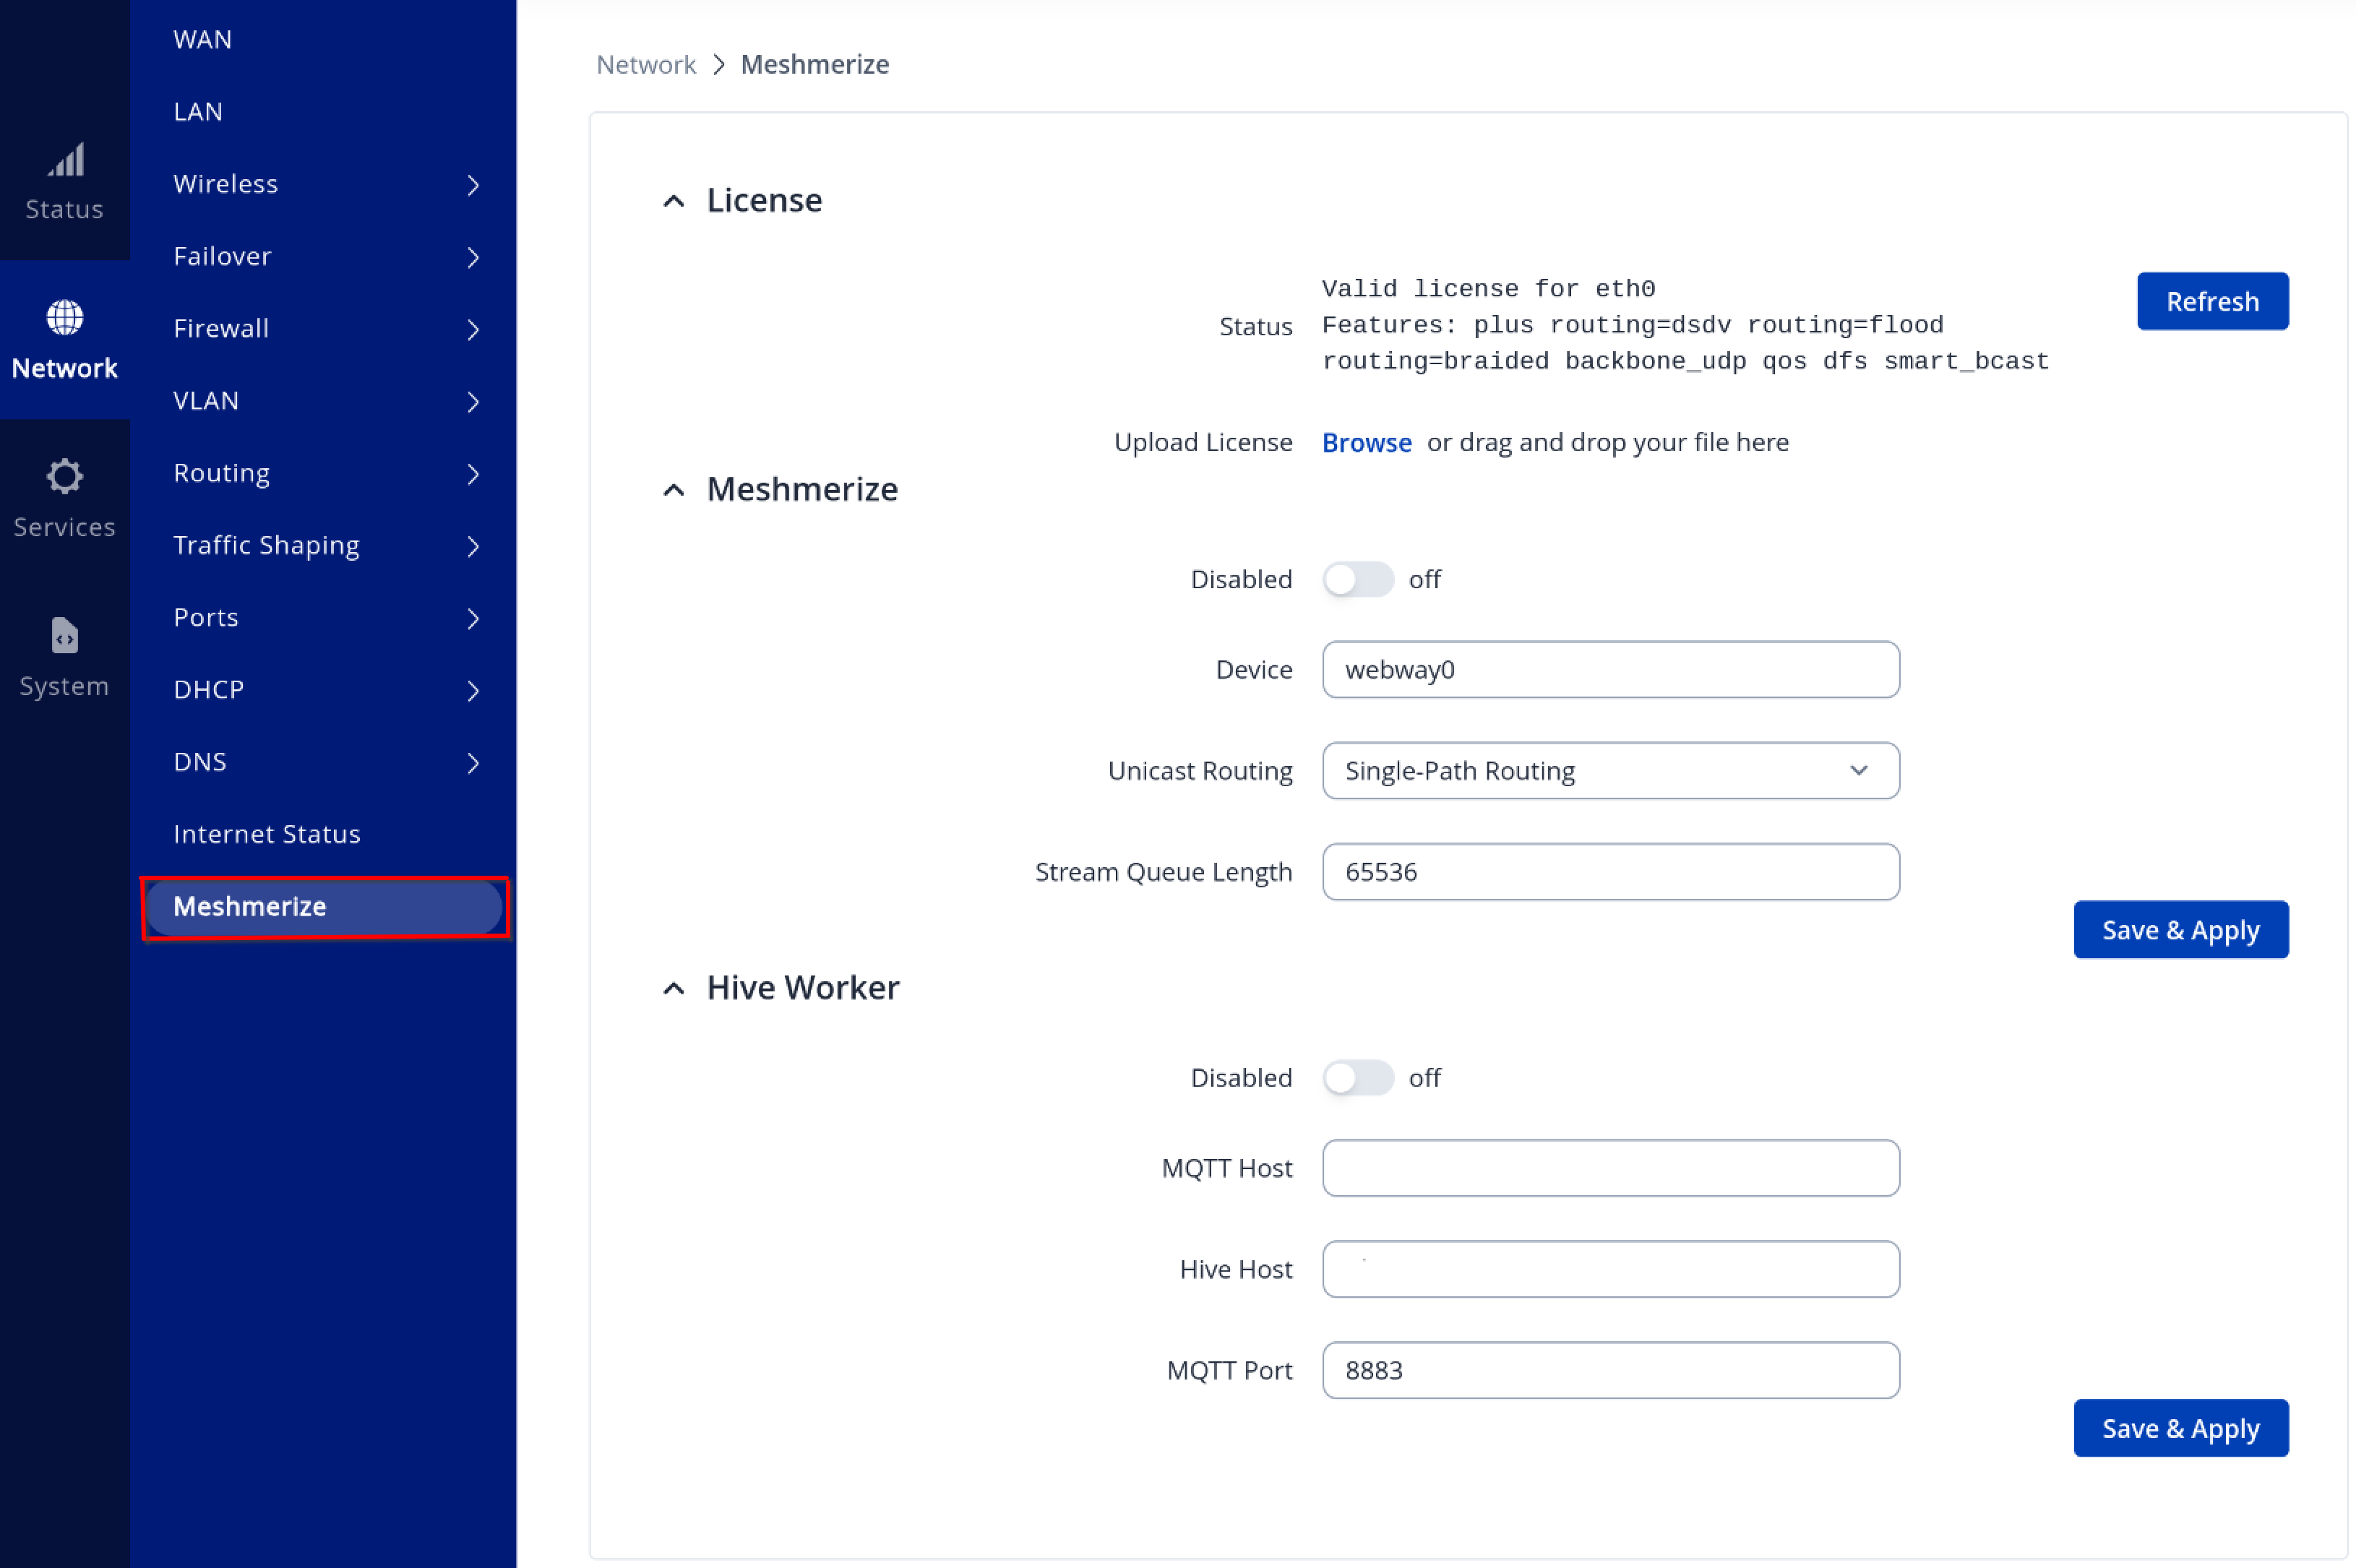
Upload a valid license file in the License section to enable all the features of Meshmerize. The license status will reflect the current state of the installed license.
MeshmerizeOS comes up with two standard mesh interfaces configured on the 2.4 GHz and 5 GHz radio frequencies. In the Meshmerize section of the Meshmerize page, the device can also be configure different routing settings and stream length easily through the Web UI. To fully enable configuration through Hive enter your Hive details in the Hive-Worker section configuration. Follow this Hive Activation Guide link for detailed instructions.
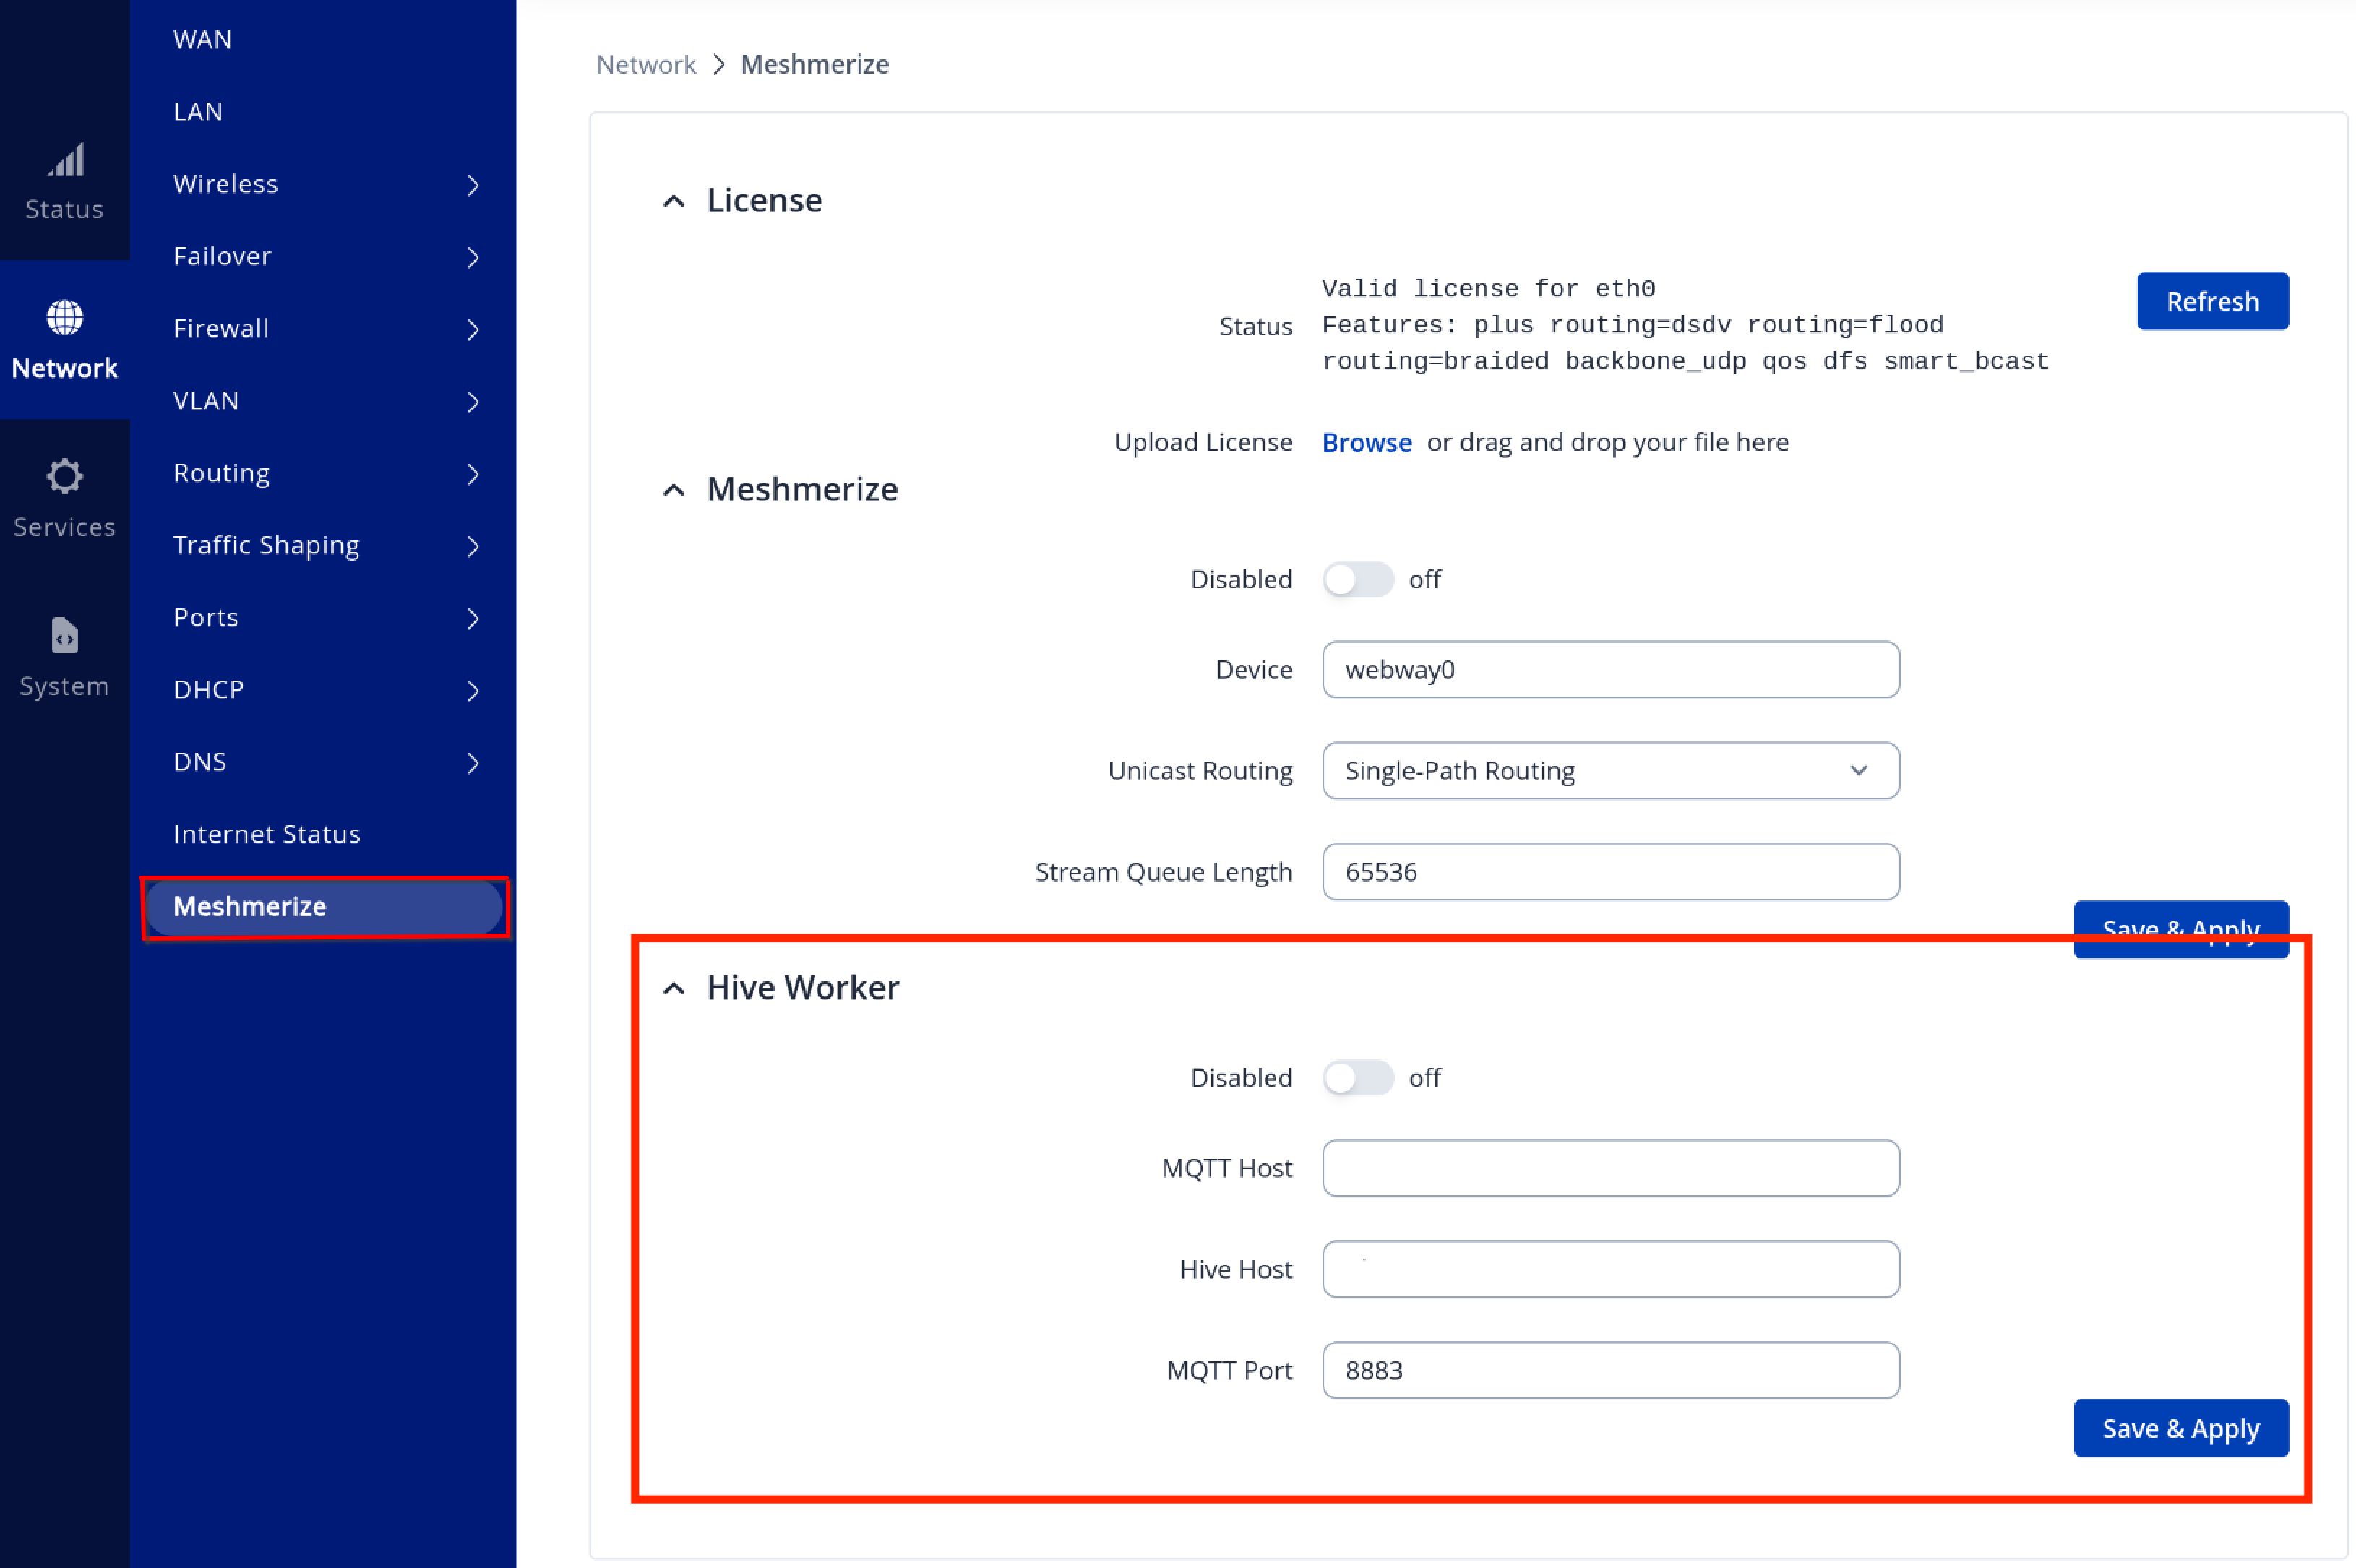
¶ Hive worker Setup
Copy your Hive deployment URL from the portal and paste it in the section indicated below
Ensure that the DISABLED switch is OFF