In this document, we will go over how to start using Meshmerize and Hive for your devices. If you would like to know more about Hive before proceeding, head out to the Hive User Guide. We will assume in this guide that your devices already have an OS compatible with Meshmerize installed. If you need more information about compatible devices or how to install the right OS for them, have a look at the Device Overview.
You can start using Meshmerize in 5 easy steps
- STEP 1 : Activating the Licenses on your devices.
- STEP 2 : Creating a Hive Deployment.
- STEP 3 : Activating Hive on your devices.
¶ 1. Activating the Licenses on your devices
If your device needs to be flashed, please follow the device specific page from here: https://meshmerize.net/supported-devices/
Teltonika RUTX device instructions are here : https://docs.meshmerize.net/en/public/devices/teltonika-rutx-series#installation
Once you have Meshmerize compatible image and enough entitlements in the portal:
¶ If your devices have access to the Internet
If your devices have access to the Internet, they can register themselves to the portal. You can do so via the device's web UI.
¶ From the Web UI
- If your device uses MeshmerizeOS see: https://docs.meshmerize.net/en/public/guides/meshmerize-quick-tests#activate-meshmerize-license
- If your device uses WaveOS see: https://docs.meshmerize.net/en/public/acksys/waveos-guide#h-3-meshmerize-license-registration
¶ If your devices do not have access to the Internet
If your devices do not have access to the Internet, you will need to register them from the portal: go to the "Devices" section in the left panel and click the "License new device" button.
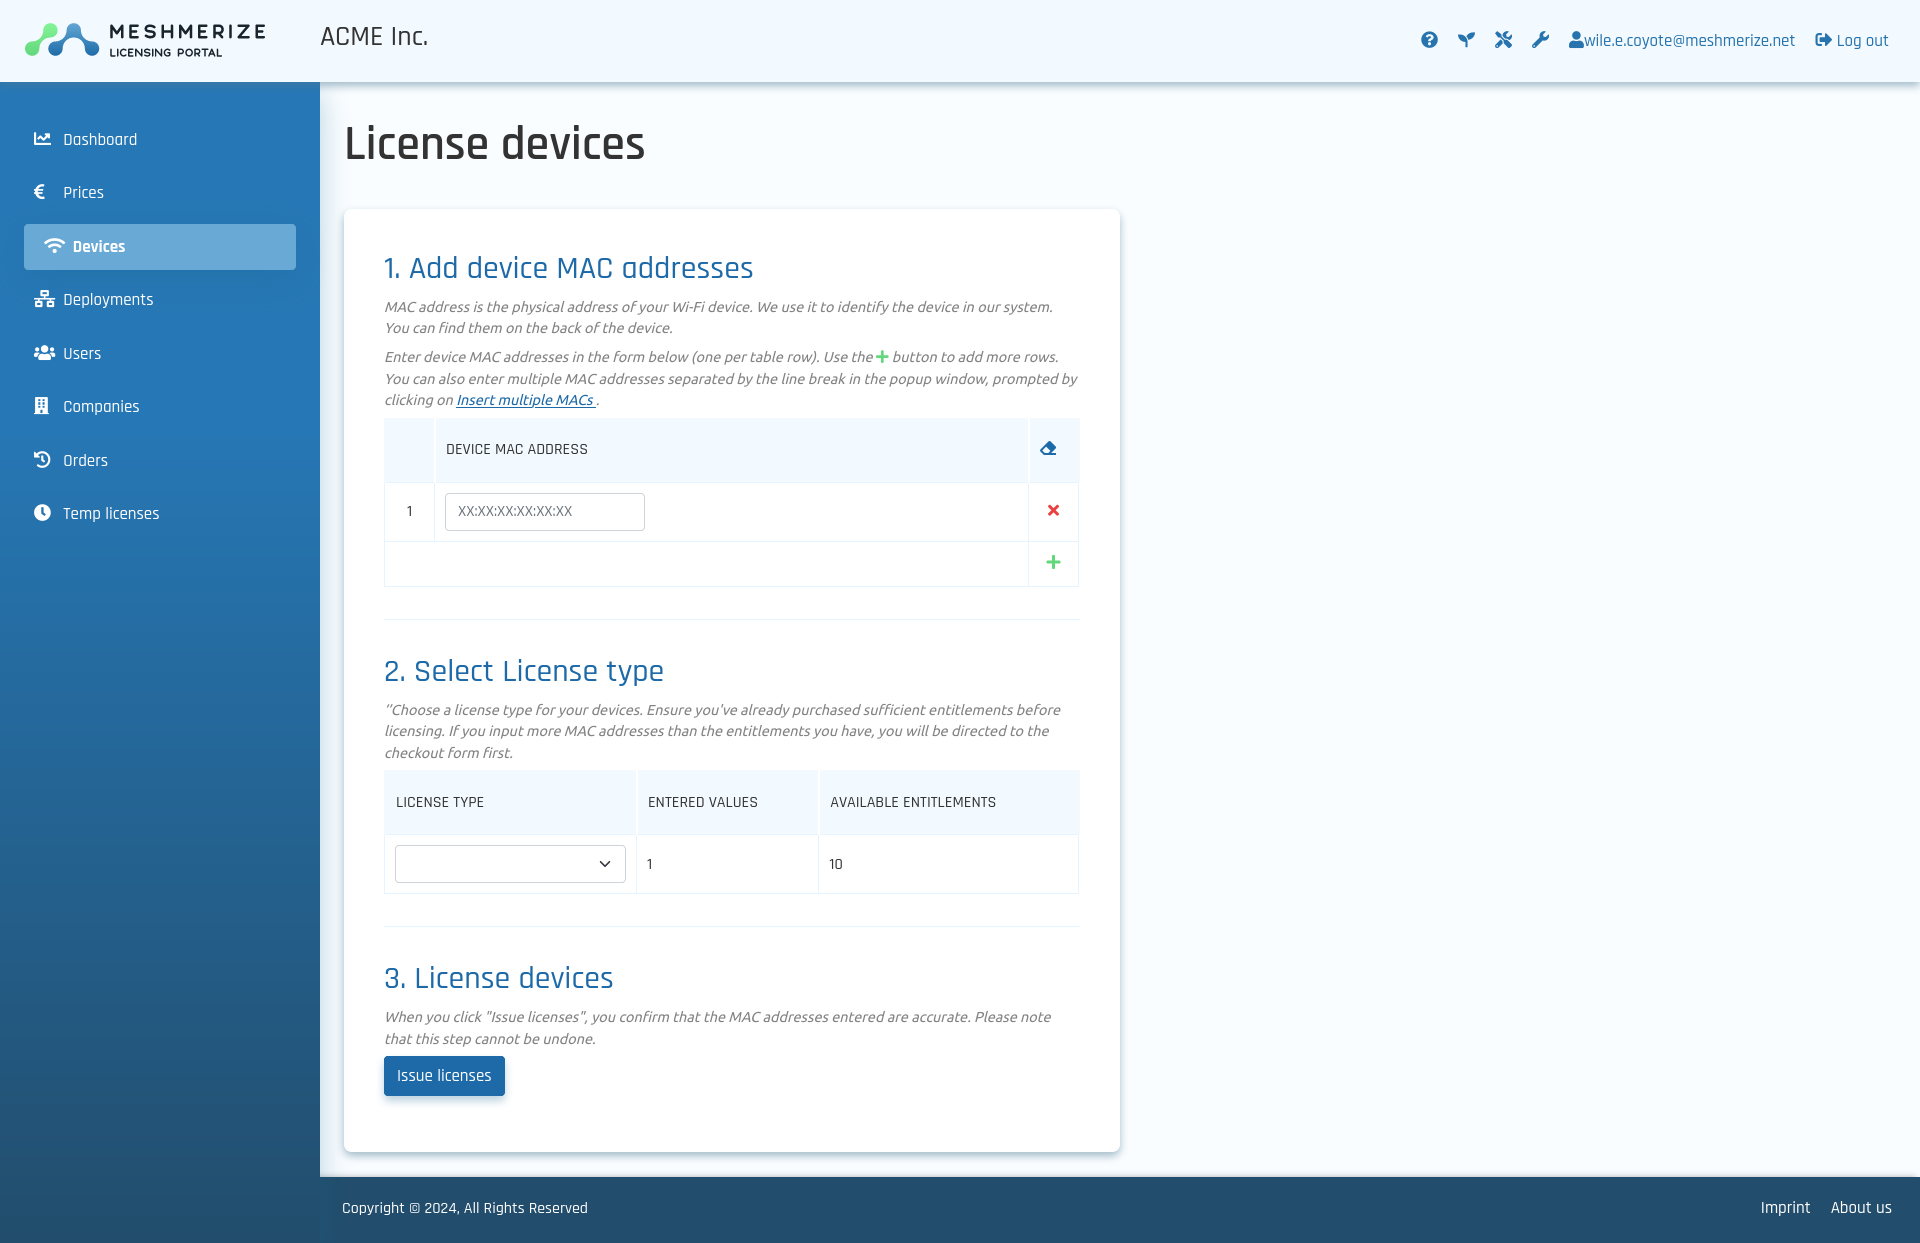
Once you have entered the MAC addresses, select the type, and finally click the "Issue licenses" button at the bottom of the page. You will then be redirected to the device page.
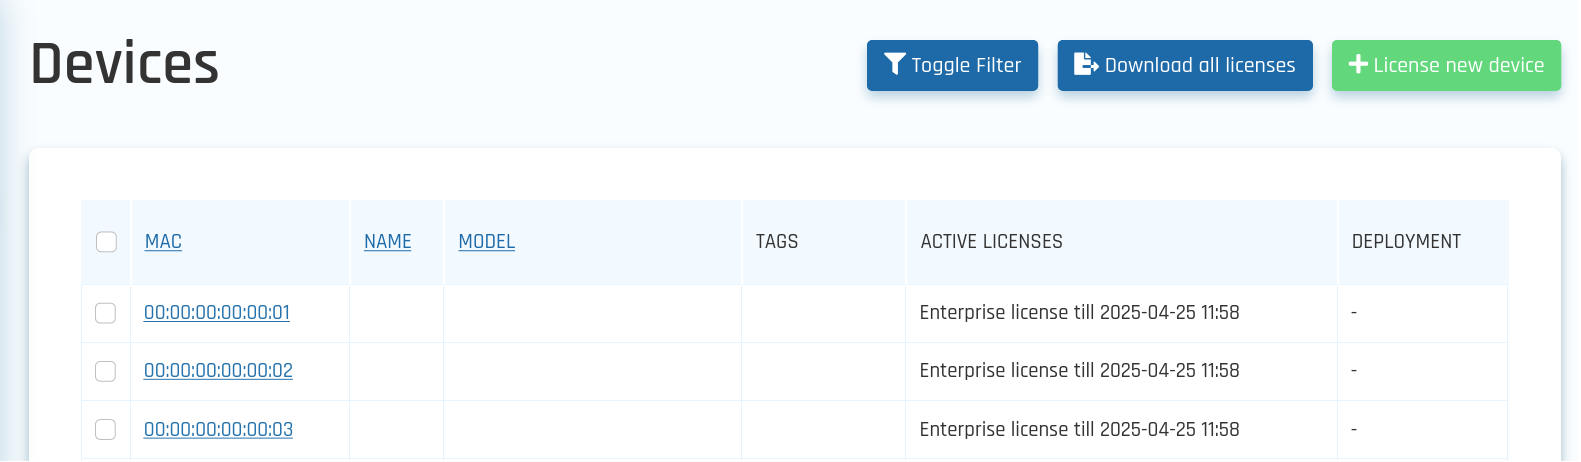
From there, select the devices you have licensed by clicking the box to their left then click the "Download n selected licenses". You will then receive a file named meshmerize.license that you need to upload to your devices. Note that it is also possible to use the web UI of the devices to install this file.
TIP : ENSURE your devices have unique static IP addresses before you activate the mesh. This will help you access the UI at a later point when needed.
- If your device uses MeshmerizeOS see: https://docs.meshmerize.net/en/public/guides/meshmerize-quick-tests#activate-meshmerize-license
- If your device uses WaveOS see: https://docs.meshmerize.net/en/public/acksys/waveos-guide#how-to-activate-a-meshmerize-license
- If your device is Doodle Labs see : https://docs.meshmerize.net/en/public/guides/doodle-labs-setup-guide#h-3-meshmerize-license-registration
- If your device is Teltonika RUTX see: https://docs.meshmerize.net/en/public/devices/teltonika-rutx-series#getting-started
¶ 2. Creating a Hive deployment
To create a deployment, you simply need to click on the "Deployments" section of the left panel, then click the "Create Deployment" button. You will be redirected to this form, that you need to fill:
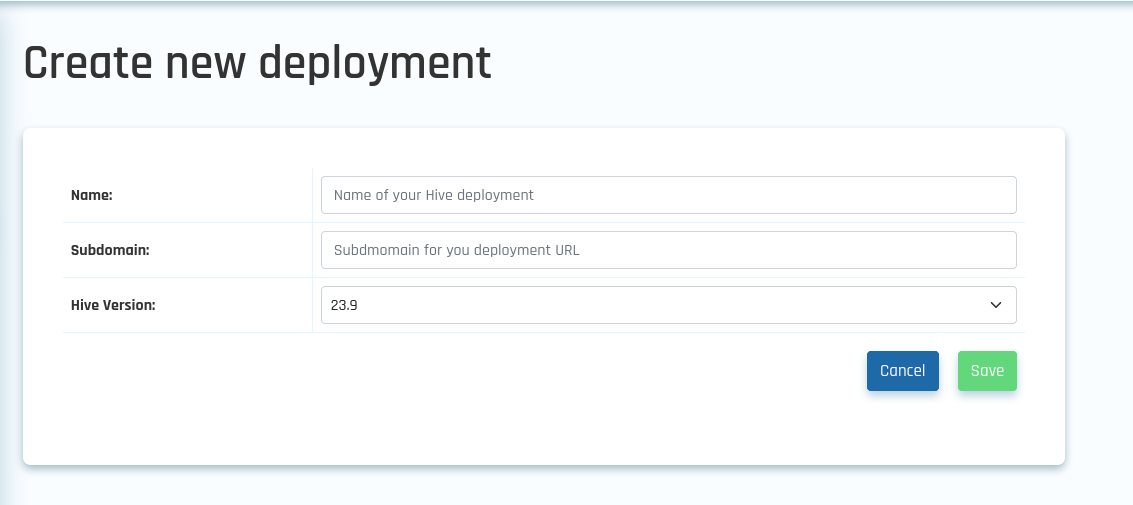
The subdomain may only contain alphanumeric characters and hyphens (i.e letters from A to Z, digits or -; if you enter uppercase letters, they will be converted to lowercase). The purpose of this subdomain is to personalize the URL of the Hive deployment you are creating: if you choose mydomain, the URL of your Hive will be https://mydomain.hive.meshmerize.net. The latest Hive version will be automatically selected in the "Version" field and you do not need to change it.
Once this is done, you will land on a page showing you the details of your deployment.
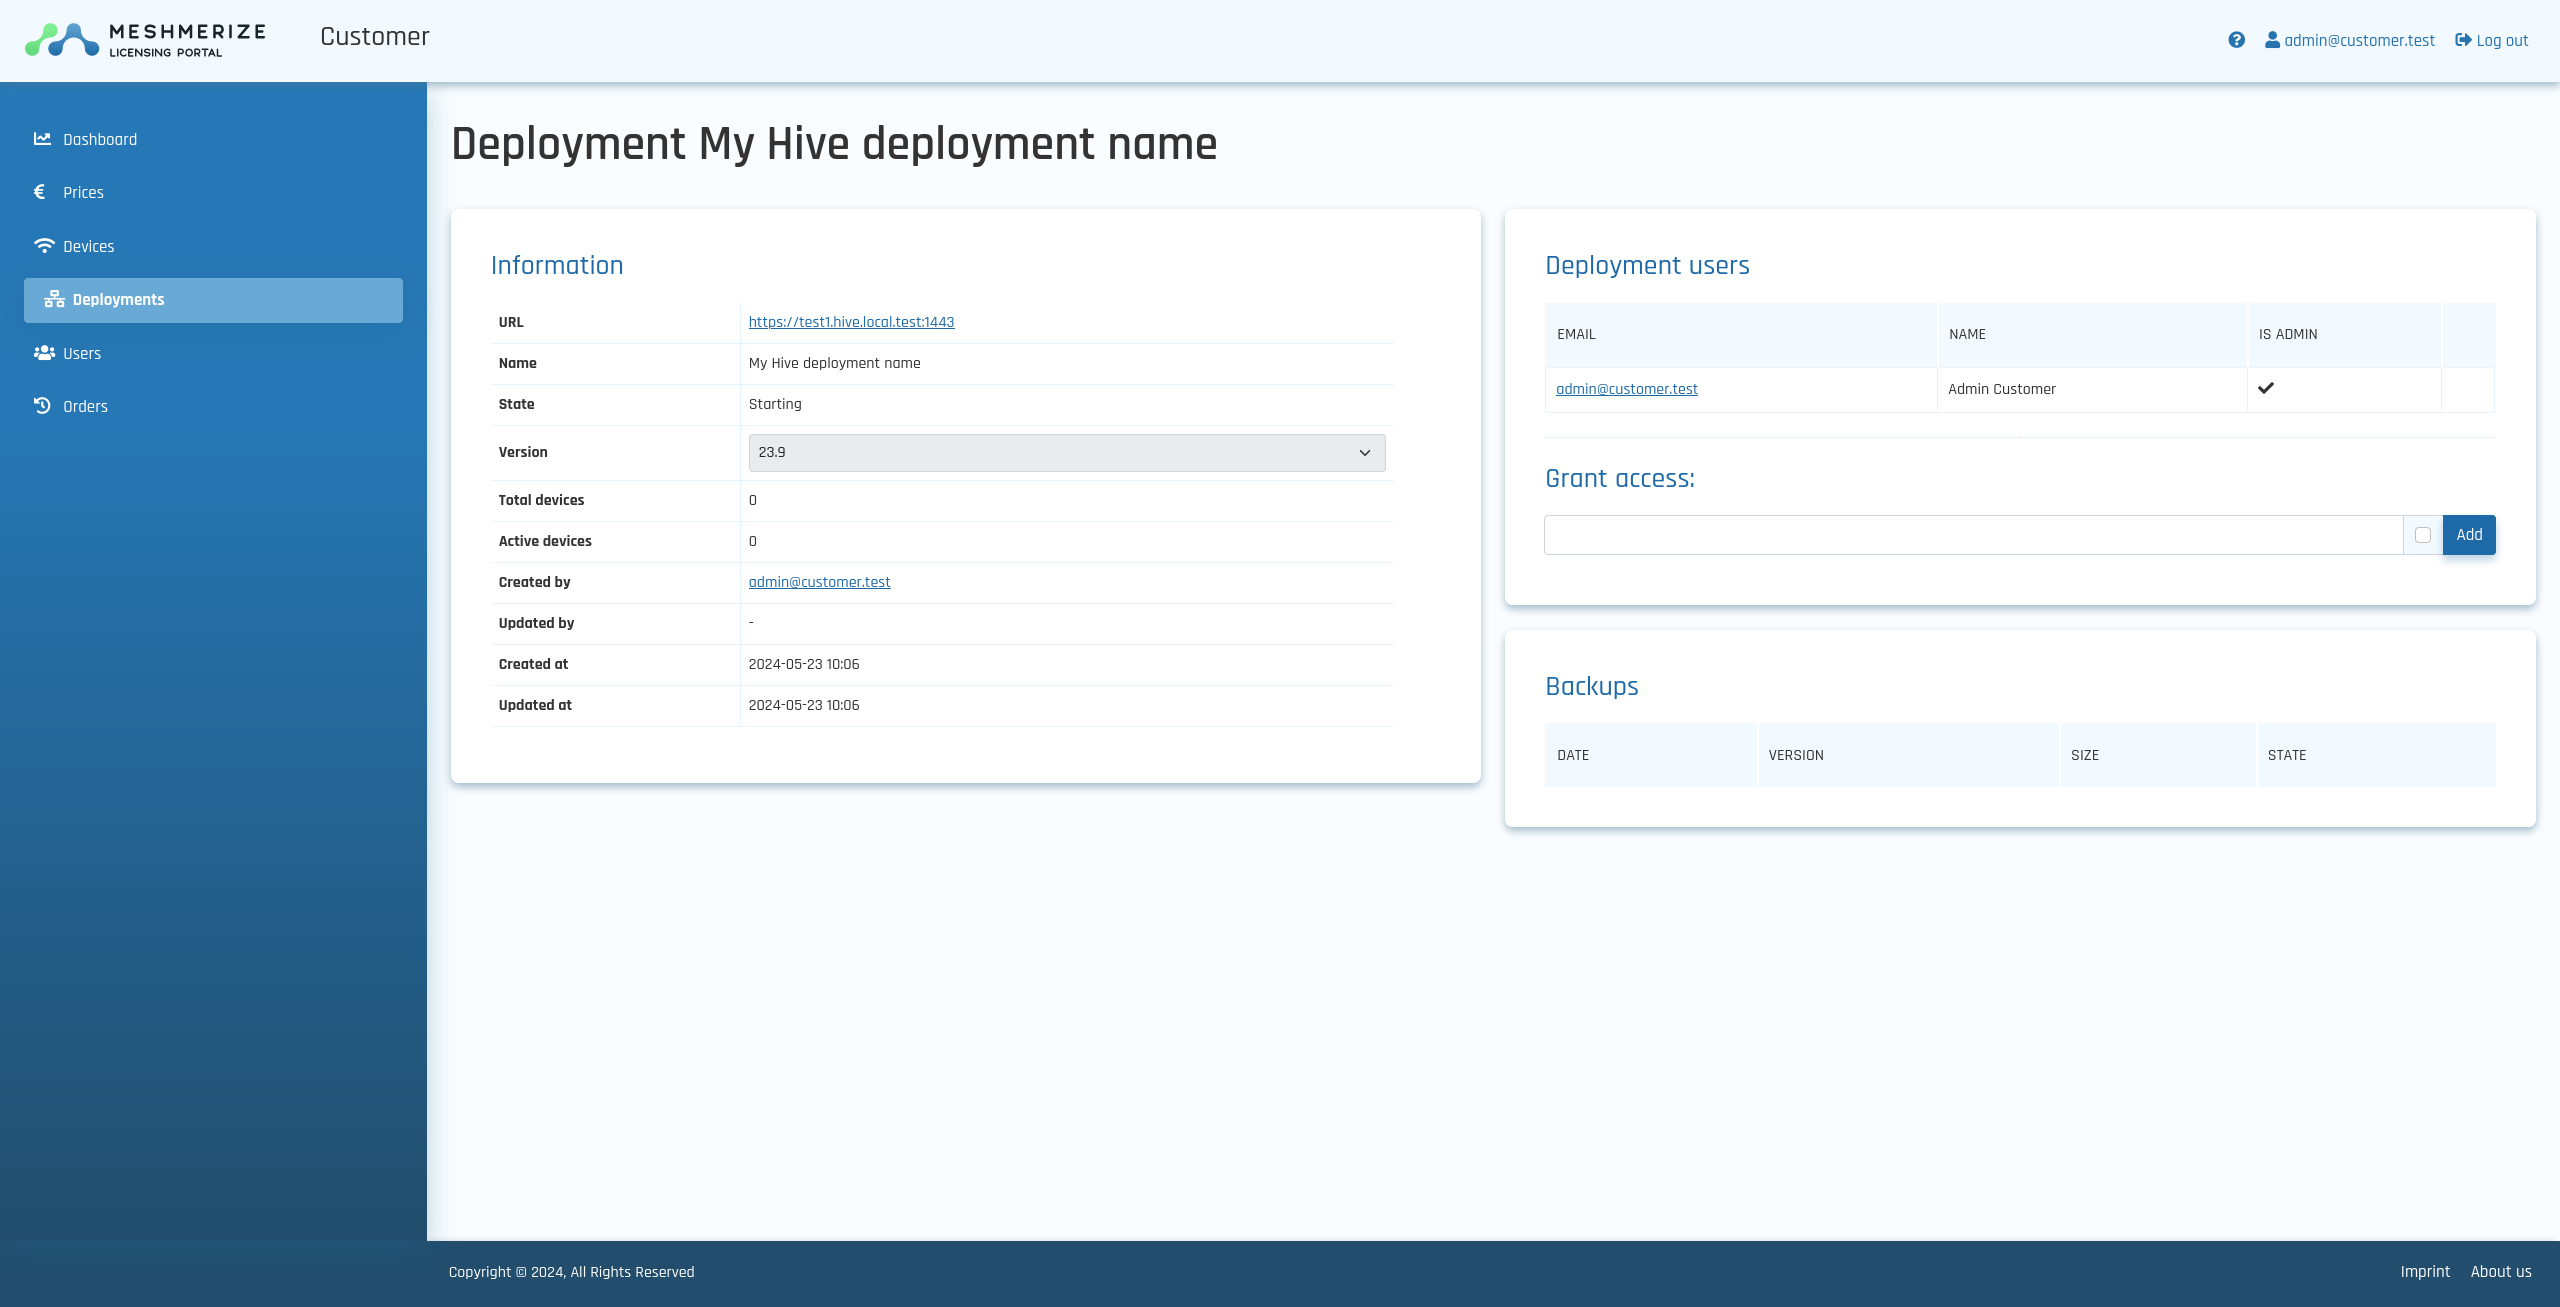
Note the State section: it will show "Starting" for a short time, while your Hive deployment gets created. Wait a couple of minutes then reload the page.
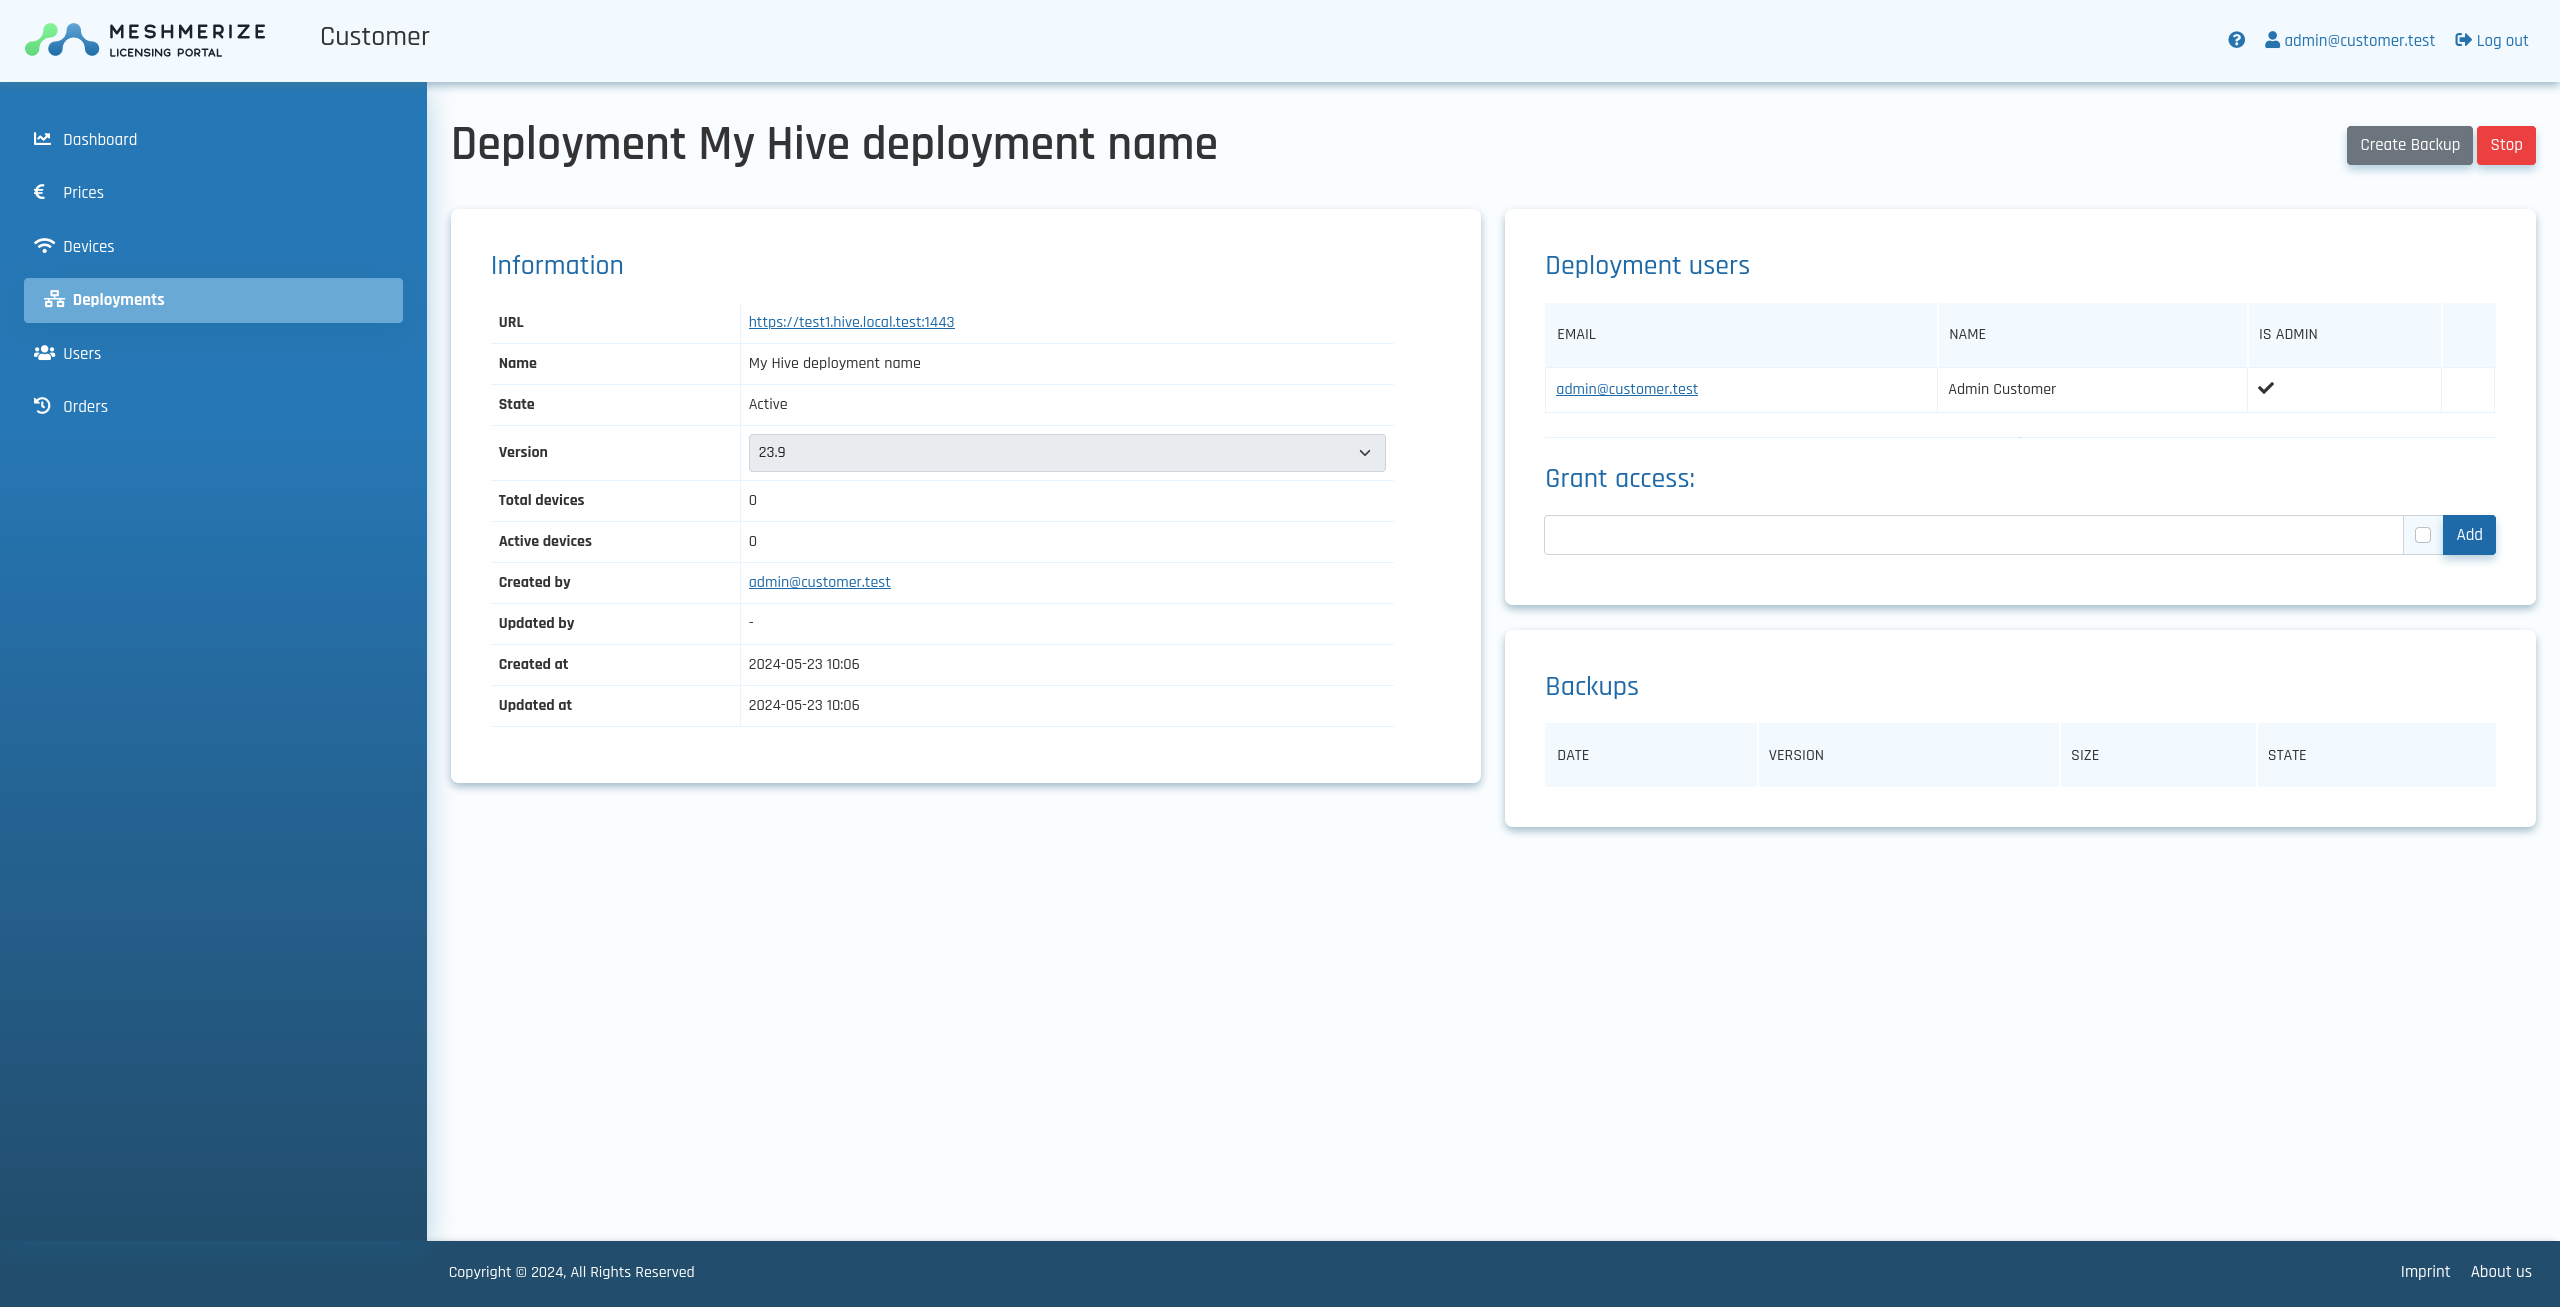
It should show "Active" instead of "Starting"; you may now follow the URL to visit your Hive deployment.
¶ 3. Activating Hive on your devices
To use the Hive with your device, a separate program, that we call the "Hive worker" needs to be started on your device. Similar to the licensing, this can be done via the Web UI.
¶ From the Web UI
- If your device uses MeshmerizeOS see: https://docs.meshmerize.net/en/public/guides/meshmerize-quick-tests#optional-connect-the-device-to-hive
- If your device uses WaveOS see: https://docs.meshmerize.net/en/public/acksys/waveos-guide#enable-hive-worker
- If your device is Doodle Labs see : https://docs.meshmerize.net/en/public/guides/doodle-labs-setup-guide#h-5-optional-hive-worker-setup
- If your device is Teltonika, see : https://docs.meshmerize.net/en/public/devices/teltonika-rutx-series#hive-worker-setup
Troubleshooting : https://docs.meshmerize.net/en/public/guides/hive-user-guide/connecting-devices-to-hive#troubleshooting
¶ NEXT STEP? Configuring your devices using Hive
You can follow the guide here to configure your devices using Hive: https://docs.meshmerize.net/en/public/guides/hive-user-guide/how-to-use-templates